UK - European distributor, supplier and specialist repairer of FANUC CNC Parts. OEM brand names and trademarks featured are the property of their respective authorised owners and for descriptive purposes only.
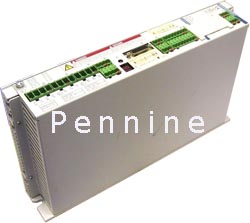
DKC11.3-040-7-FW Rexroth Indramat
DKC11.3-040-7-FW Indramat AC Servo Amplifier
|
DKC11.3-040-7-FW - IN STOCK
|
 |
Email or Phone to check the availability of CNC Parts like this DKC11.3-040-7-FW Indramat Digital AC Servo Amplifier. We provide the best service possible to assist you with any problems you have. All Indramat Eco drives carry a Warranty and have been tested on our closed loop Indramat Test Beds. We mostly offer service exchange on this DKC1130407FW Analog interface Ecodrive to install it you will need Drivetop software or we can install your parameters from your faulty drive subject to them not being corrupt we charge for this service. You will also need to order the DKC11.3-040-7-FW replacement with the right firmware. Our chief engineer used to commission these servos and was trained by bosch rexroth we were indramat approved installers and standardised on these and Fanuc drives for new installs and retrofits today we sell, repair and provide support on them. Rated output is 11 amps.
DKC11.3-040-7-FW Technical DKC1130407FW
Danger of an accident with life-threatening voltage levels! ⇒ 1. Before working with electrical equipment, turn off the main switch and take steps to insure that it will not be switched on again. The drives must be at a stand still because motor rotations cause voltage to be generated back through the motor power cables. 2. Do not separate live connections
Exchange the Indramat DKC servo amplifier: • Turn off the main switch • protect against the drive being turned back on prematurely ⇒ Before making contact with the connecting lines and clamps, wait for the capacitor to discharge for at least 1 minute! Only then should you begin work with the connecting cables! • Separate the connecting lines from the DKC • Remove the screws from the upper and lower portions of the casing. Remove the DKC from the drive package. • Insert the new DKC and tighten the screws. • Attach the new DKC according to the machine control plans. • Load the parameter file from Drive Top which was saved during the installation into the DKC. • Power up the machine


